free virus scan

How to Register DLL Files in Microsoft Windows XP?

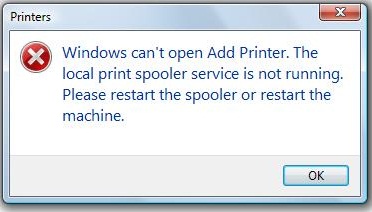
A DLL (Dynamic Link Library) is a grouping of files that include both data and executable codes that are able to be used by one or more programs at the same time. A common task that arises for home computer users is figuring out how to register a DLL to allow the desired computer software to operate properly. If you need to register a DLL due to some sort of corruption or installation failure, you can do it manually. Follow the given steps to re-register a DLL file in windows XP.

How to Register DLL Files in Microsoft Windows XP?Step1: Click the “Start” menu button and go to the “Run” option.

Step2: Type “cmd” into the Run box and press “Enter”. The windows XP Command Prompt will open up.

Step3: Enter regsvr32 “path and FileName.dll” into the Windows XP Command Prompt and press "Enter". The path is the actual location of the DLL file or directory on the computer’s hard or networked drive. Example of this entry is: Regsvr32 “C:WindowsSystem32example.dll”. That’s it! The Dll file has been registered successfully now.

Step4: Type “exit” and press “Enter” to close the windows XP command Prompt.


If you want to fix windows XP slow start up then follow this blog-How to Fix Windows Xp Slow Startup

You can also see: What to Do When Microsoft Windows XP Won't Shut Down
                              How to Recover Deleted Files from Window XP

What to do when Microsoft Windows 7 keeps restarting itself

What to do when Microsoft Windows 7 keeps restarting itself
When a computer keeps rebooting itself, it can happen due to a wide range of problems, like -incompatible software such as Firewall and Antivirus software, damaged or overheating parts inside your computer or even incompatible peripherals such as printers and scanners. If your computer is virus infected, that time your system would tell you that there is no operating system found or you may get blue Screen of death(see also: how to prevent blue screen death).

Follow the given steps to fix your windows 7 problems.

Step1: When you turn on your computer, make sure that the fan in running in the very beginning. If your computer is virus infected, that time your fan will continue running without displaying anything on the screen.

Step2: Run a complete system virus scan and malware scan to check for any viruses or malware presented in your system.
Step3: The other reason your computer might be turning off is because it is overheating. The CPU is not getting a lot of air flow. Place a cooling fan nearby your computer.

Step4: Try to run your operating system in safe mode. Remove CDs or DVDs (if it is inside) from your computer, and then restart your computer. And press F8 key repeatedly and Use the Down arrow key to choose the option Safe mode and press the Enter key.

Step5: When your computer is in safe mode, you'll see the words Safe Mode in the corners of the display. To exit safe mode, restart your computer without pressing the F8 key.

Step6: Sometimes Windows 7 keeps restarting due to the errors in Windows registry. Clean Windows registry and prevent windows 7 problems.

See also:How to Resolve Windows 7 BOOTMGR Missing Error

How to Reset a Password in Windows 7 Safe Mode

By running your computer in safe mode, non-essential processes do not start and non-core components are disabled. This basic mode allows you to troubleshoot computer problems and gain access if you have forgotten the password of a user account. To reset Windows 7 password in safe mode, an accessible administrator account is required. Follow the given steps to reset password in windows 7 safe mode.

Reset a Password in Windows 7 Safe ModeStep1: Restart or power on your computer, and immediately repeatedly press the F8 key.

Step2: In the Windows Advanced Options Menu screen, use the Down arrow key to select Safe Mode and press Enter. Booting in safe mode may take little longer than booting in normal mode.

Step3: Select a user account with administrator permissions that you can log on with its password.

Step4: When your system finishes booting, open the Local Users and Groups Window by clicking Start button and inputting “lusrmgr.msc “into the Start Search box.

Step5: In the Local Users and Groups Window, expand Local Users and Groups, and then expand Users.

Step6: Right-click the account that you need to reset the password for, and then click Set Password. Type and confirm the new password.

Step7: Restart your computer. You’ll be able to log in to the target user account with the newly created password.

Tip: If you are unable to reset password in safe mode, you can get technical support .To get windows 7 support, you can reach  online technical support service desk from V tech-squad at their Toll Free No +1-877-452-9201.

See also:How to Create a Login & Password for Windows 7

How to Connect a Dell Printer to a Wireless System

Wireless network is the best option to share your resources on multiple computers in your home. With a wireless network in place, you can share files between your laptop and desktop, play music from one PC to another. You can also print from anywhere in your house with a Dell wireless-enabled printer. Follow the given instruction to connect a dell printer to a wireless system.

Step1: Open the top of the printer and install the ink cartridges. Make sure you remove the small pieces of tape from the bottom of each ink cartridge before snapping the cartridges into place.

Step2: Place the Dell wireless printer on a flat surface, plug it in the power outlet and turn it on. Since Dell wireless-enabled printers have built-in wireless cards, your wireless computer will automatically be able to detect it on your wireless network.

Step3: Turn on your computer and login using your username and password. Select your wireless network and connect to it. Enter the password for your wireless network when prompted. When connected with your wireless network, insert the software installation disk that came with your Dell printer. Follow the onscreen prompts and connect the USB wireless setup cable when prompted.

Step4: Connect the square end of the USB cable to the port on the back of the wireless printer, and then connect the flat end to a free USB port on your computer. The software installation will inform you when the cable can be removed. After the cable has been removed, the printer is set up and ready for use.

When your printer does not receive all the data from the printer queue that time printer give the spooler error. To fix this error follow this blog-How to Fix a Printer Spooler Error.

Note: To get printer support, you can reach  online technical support service desk from V tech-squad at their Toll Free No +1-877-452-9201.
 

See also: Steps for Dell 1720 Printer Troubleshooting

How to Scan Windows and Fix Errors

scan windows and fix errors
Microsoft’s Windows 7 operating systems include a built-in utility that allows you to scan your computer and fix file system errors automatically. This task helps you to improve the hard drive performance and solve drive functionality problems. Once you understand how to access the utility and set the appropriate options, scanning Windows and fixing file system issues becomes a quick process. Follow the given steps to perform this task.
To change the windows wireless firewall settings ,follow this blog-How to Change the Windows Wireless Firewall Settings.

Step1:  Close all programs.

Step2:  Click the Windows "Start" button and select "Computer."

Step3: Right-click the name of the drive which you want to scan and select "Properties." By default, Windows resides in "C:" drive.

Step4: Select the "Tools" tab located near the top of the resulting dialog box.

Step5:  Click the "Check Now" button, located below the "Error-checking" heading. Confirm your choice if prompted by Windows.

Step6:  Check only the box labeled "Automatically fix file system errors."

Step7:  Click "Start." The scanning process begins immediately. It generally completes within 10 minutes.

To solve windows 7 bootmgr missing error,follow this article-How to Resolve Windows 7 BOOTMGR Missing Error.

Note: If you are  not able  to solve this problem then you can reach online technical support service desk of V tech-squad at their Toll Free No +1-877-452-9201.  


How to Fix a Printer Spooler Error

fix a printer spooler error
The print spooler service controls your print job queue. It acts as an interface between your computer and the printer to send this data to the printer's queue. A print spooler error indicates that something went wrong with the print spooler, and the service needs restarting before you can continue sending jobs to the printer. Printer spooler error detect that printer not receive all of the data from the printer queue.
If you want to install new hp photosmart printer then follow my blog-How to Install an HP Photosmart Printer.

Step1: From start button, choose control panel.

Step2: In the text field at the top right of the window, type "Administrative Tools" and click on the result.

Step3: Double-click the "Services" option in this panel. Go through the services list to find "Print Spooler." Double-click "Print Spooler" to launch the Properties menu.

Step4:  Change "Startup Type" to "Automatic" on the drop-down menu if it is not already selected.

Step5: Click the "Start" button if it is not grayed out. Click "OK." Windows starts up the Print Spooler service and your printer is to accept data once again.

If you want to connect hp printer with your computer then follow this article -How to Connect My HP Printer to a Computer.

Note:If you want to get technical support  for any printer problem  then you can reach online technical support service desk of V tech-squad at their Toll Free No +1-877-452-9201.  

How to Create a Virtual Drive

A virtual drive is a form of drive on your PC that maps to a virtual folder. This is a special folder that acts as if it's a separate drive in itself. With a virtual drive, users can create virtual CD-ROM and DVD-ROM drives. CDs and DVDs can be mounted as a disk image, which is usually in ISO, CUE, or BIN format. . A key advantage of a virtual drive is that it usually saves time. A virtual CD drive, for example, can be read much faster than a physical CD drive because it exists on the hard drive.
If you want to partition hard drive in windows 7 computer then follow this article-How to Partition Hard Drive in Windows 7 Computer.

create a virtual drive
Step1: From start menu, right clicks on computer then click on manage.

Step2: Right-click "Disk Management" in the left pane and from action and click "Create VHD." Follow the onscreen prompts to create a virtual drive.

Step3:  Right-click the new drive and click "Initialize Disk." Then click "OK."

Step4:Browse to the directory you want the disk to reside, choose the size you want it to be, and select dynamic or a fixed. If you want the disk to expand in size as you add files to it, then pick Dynamically expanding. Check Fixed size if you want a specific size and for it to stay that way.

Step5: Right-click the new drive again and click "New Simple Volume." Follow the onscreen prompts. Once that setup is finished, your virtual drive is ready for use.

Step6: Close your Registry Editor and restart your PC. And you're done!

Stores all the system information including new and modified in your system need backup registry.To create backup registry follow my blog-How to Backup Registry in Windows 7.

Note:If you want to get technical support  for windows related problem  then you can reach online technical support service desk of V tech-squad at their Toll Free No +1-877-452-9201.